Fabulous Finds 03.14.26 Edition
2 hours ago
I made a post waaayyy back about downloading the GIMP and my intentions on learning how to use it but I haven't been as proactive on that front as I would like to be. I've looked up several YouTube tutorials and such but it's difficult for me to learn such a complex program in a piecemeal fashion. That fact and trying to find the time to experiment and play around with it has made for slow going to say the least.
I did manage to find a few hours the other day to snap a pic in SL and work on it a bit in the GIMP and here is the outcome.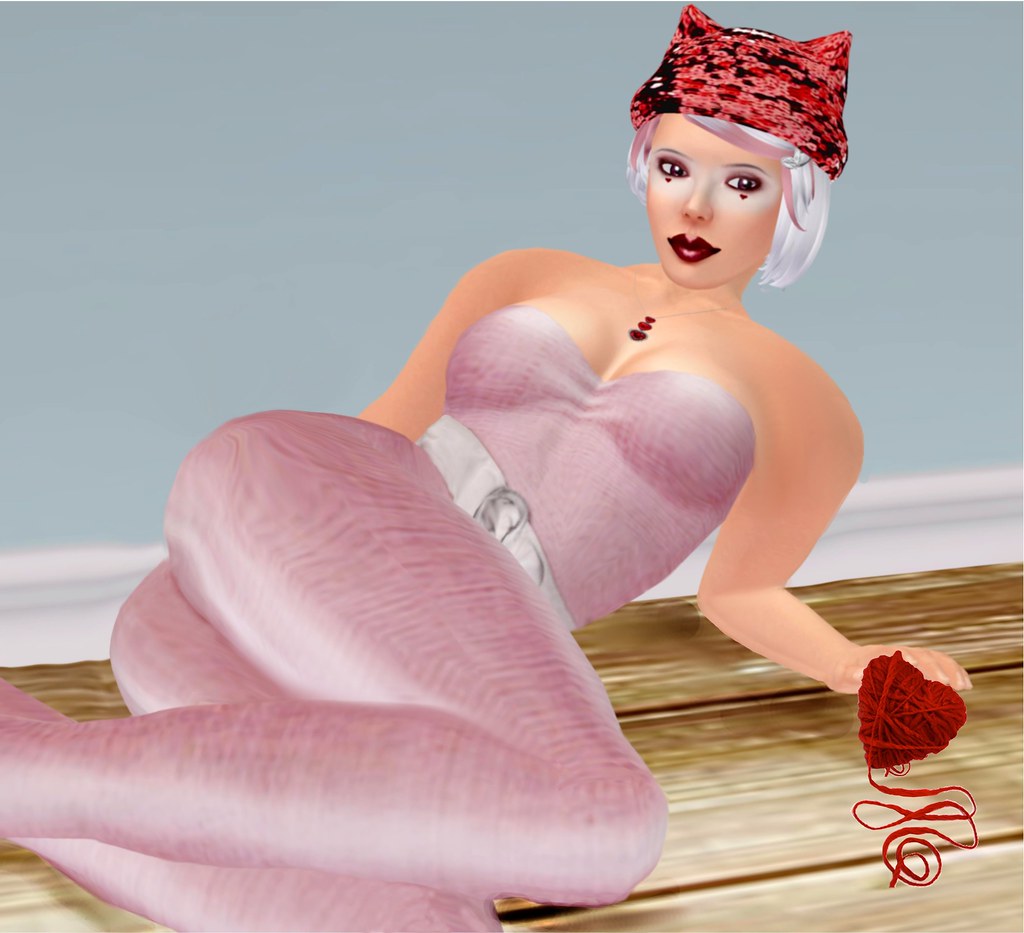
Click the Read More button below for details on how photo was altered using the GIMP.
First thing I did was create a duplicate layer to work with so that I didn't mess up my original. I actually ended up creating several different layers, one for each type of adjustment, but I'm not sure that was entirely necessary. Still, it gave me some practice in that area.
In the original picture, the arm behind her had a hand that came up and hovered over her hip. I really didn't like how it looked so I used the Clone Tool to clone the wall color and cover over the hand and the Smudge Tool to blend it better. In retrospect, the hand would look cute actually resting on the hip and I suppose that it is possible to cut out and adjust using the GIMP but for now I chose the path of least resistance.
Next, I used the iWarp Tool (Liquify in PS) to round out her booty. As you probably know, many poses in SL result in lots of ugly angles and corners that don't look remotely realistic. With a few swipes of the iWarp Tool in both Grow and Move modes I was able to give her a much more smoothed out and natural looking derriere.
My biggest accomplishment, and the one I am most stoked about, was the addition of the heart shaped ball of yarn stock image. The pose had the hand closest to the floor kind of angled up and I thought that a ball of yarn would be cute to add under the hand (being that I planned to name the pic "I Love It When You Call Me Kitten") as well as give it a reason to be angled like that. So I went to DeviantArt.com, found the most perfect stock image and downloaded it. I then opened the newly downloaded image in the GIMP, copied it and then pasted it onto a new transparent layer. The red heart was on a white background so I then removed the background using the eraser and the color selection tool until I was only left with the ball of yarn. I then moved and sized it until it looked right with the SL pic.
I used the Clone and Smudge Tools again to try to smooth out all the edges and corners on her entire body as well as correct a few clothing issues that the pose caused. I used a Gaussian Blur overlay for the first time as that seems to be one of the most basic tools most people use. I think it did help soften things up a bit and helped it to look less flat.
Overall it took me waaayyy longer than it should considering the minor changes I made but I feel that I made some significant headway in learning a bit about layers and stock images so it wasn't a total loss. I'm looking forward to learning and practicing more so that the only limits to my creativity will be my own imagination.
Eyes - Tekuteku - Eko-eye - Wine Pink - store freebie
Shape - Alady 2009 Perfect Tribute to Jula
Skin - Dulce Secrets - Ammi Champagne Skin - DSN freebie
Hair - Tea Lane - Cindi - silver / tearose w/ Tea Rose Sequined Hat - freebie
Outfit - Thalia - Belted Top (pink) & Pink Pants - freebie
Necklace - Tickled Pink - Hearts Cascade Necklace
Pose - XStreet box of free poses - tablewoman
Photo taken in La Petite Morte Photo Hall - DSN freebie
Template Brought by :
blogger templates
0 comments:
Post a Comment